Digitising images from an old photo album can be difficult. Removing them from the album may not be a good idea and putting an old photo album onto a flatbed scanner can damage it. What is the best way to scan photos to digital? The surprising answer lies in your smartphone with the free iOS and Android app from Google called PhotoScan which lets you quickly capture multiple images from an old photo album without the need to set up or use specialist equipment. PhotoScan automatically frames and straightens each photo, as well as minimising the effects of any glare.
Once the photo is taken, you can then share it with others or upload it to your cloud storage to give you access from your computer, allowing you to edit the photo further. You can also link PhotoScan to the Google Photos app, which will allow you to perform further editing on your phone for free.
Step one - Prepare your photos
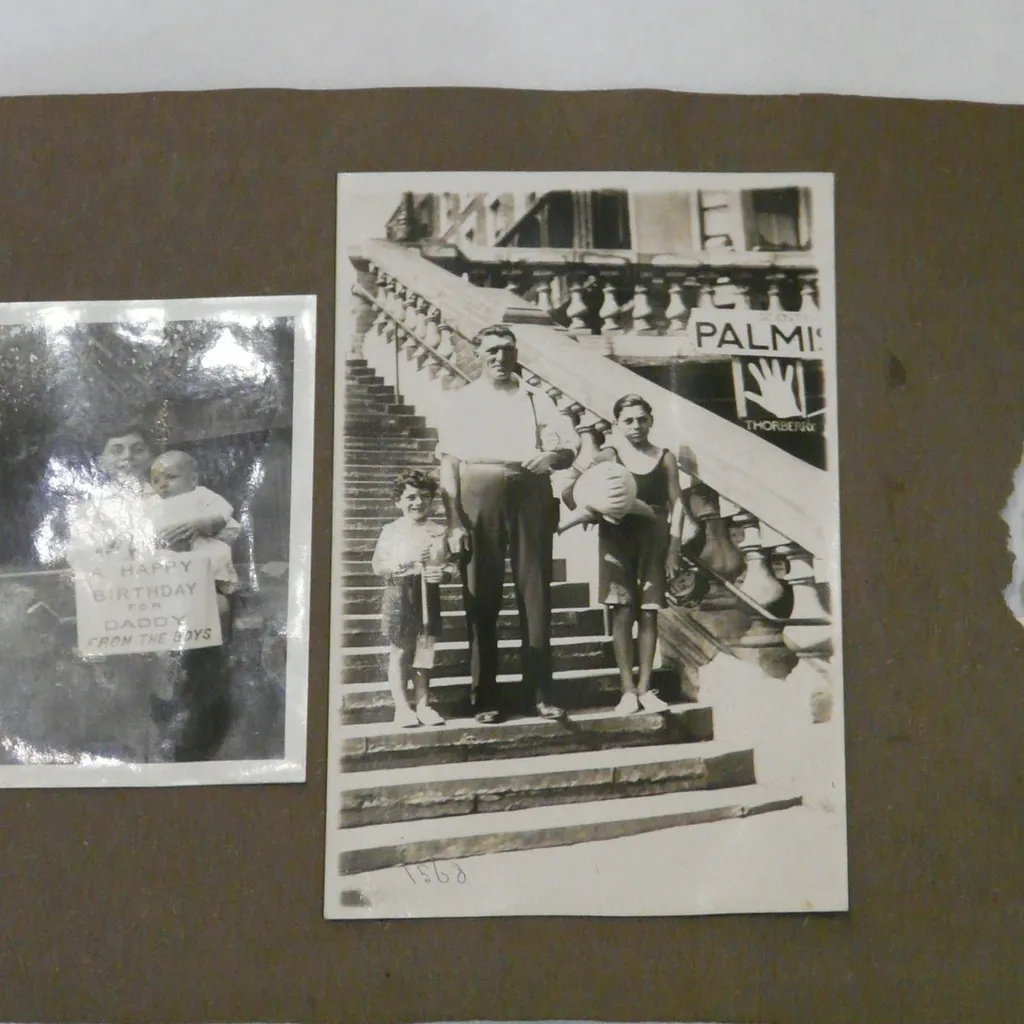
Place your old photo album on a flat surface with a good lighting source – preferably natural, and with the minimum amount of shadow. The photos themselves don’t need to be perfectly flat, so you won’t need to remove them from the album, but obviously the flatter the better.
Step two - Line up your shot
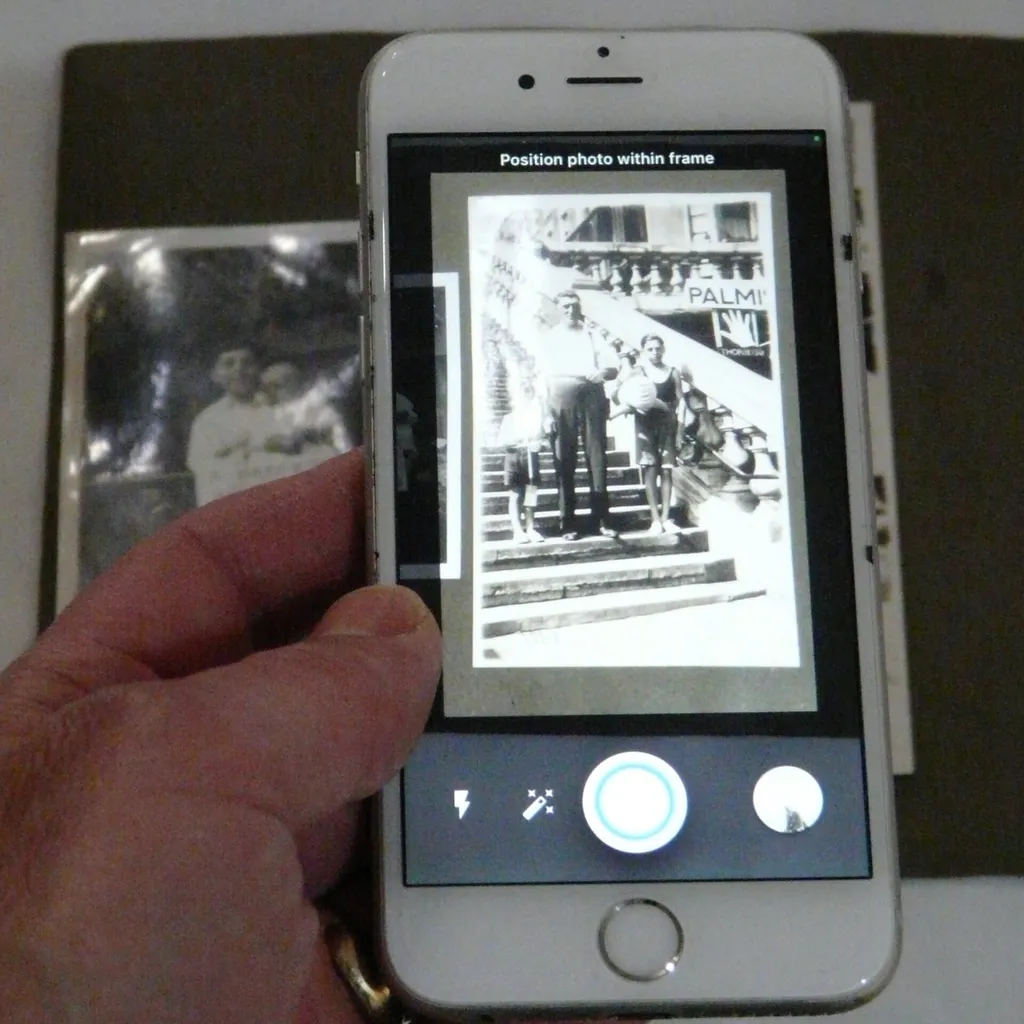
Open the PhotoScan app on your phone. You’ll be prompted to line up your first picture. Make sure that the image you're scanning is in the same orientation as the photo you're taking (ie portrait or landscape; the ‘Position photo within frame’ prompt should be at the top of the screen). Try to fill as much of the frame with the photo as possible, then tap the shutter button.
Step three - Minimise glare on PhotoScan
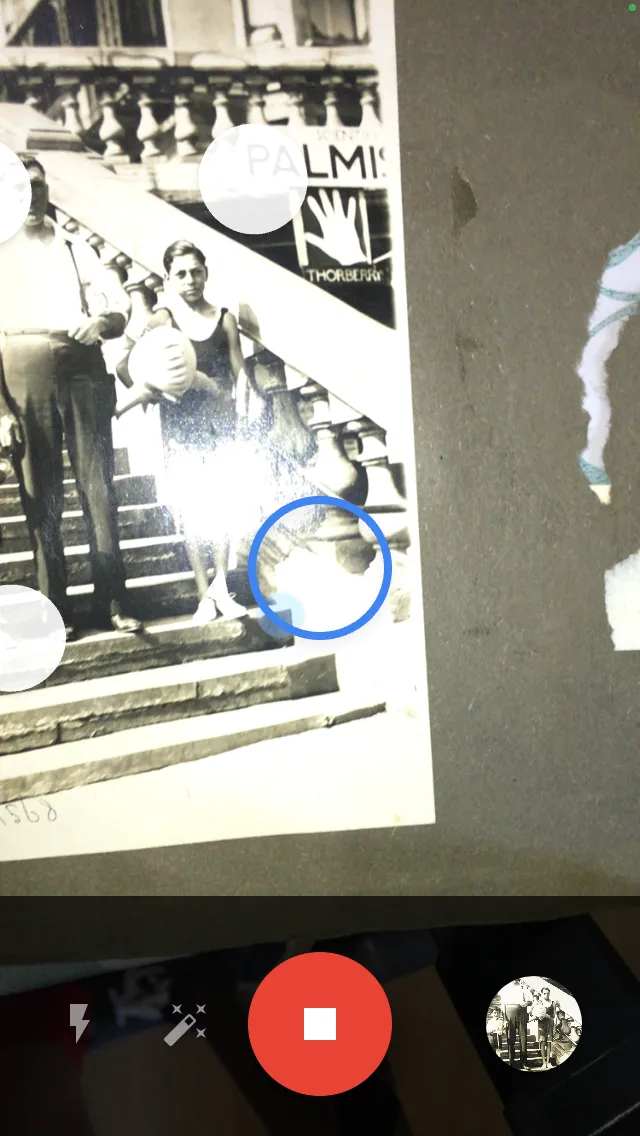
To reduce the effects of any glare, PhotoScan will now display four blue circles over the top of the camera. You need to guide the phone so that the camera sits over each one in turn – a technique that takes a little practice to master. When the circular progress bar turns blue, move on to the next one until all four are complete. The scan will now be processed.
Step four - Disable glare removal on PhotoScan
Although effective, the glare-removal tool is quite slow. If you’re pressed for time, the lighting is perfect and there’s no glare to worry about, tap the magic-wand icon to the left of the shutter to temporarily disable it. Now each photo is captured and processed with a single tap. If you need to, tap the magic-wand icon again to re-enable the tool.
Step five - Review your scan
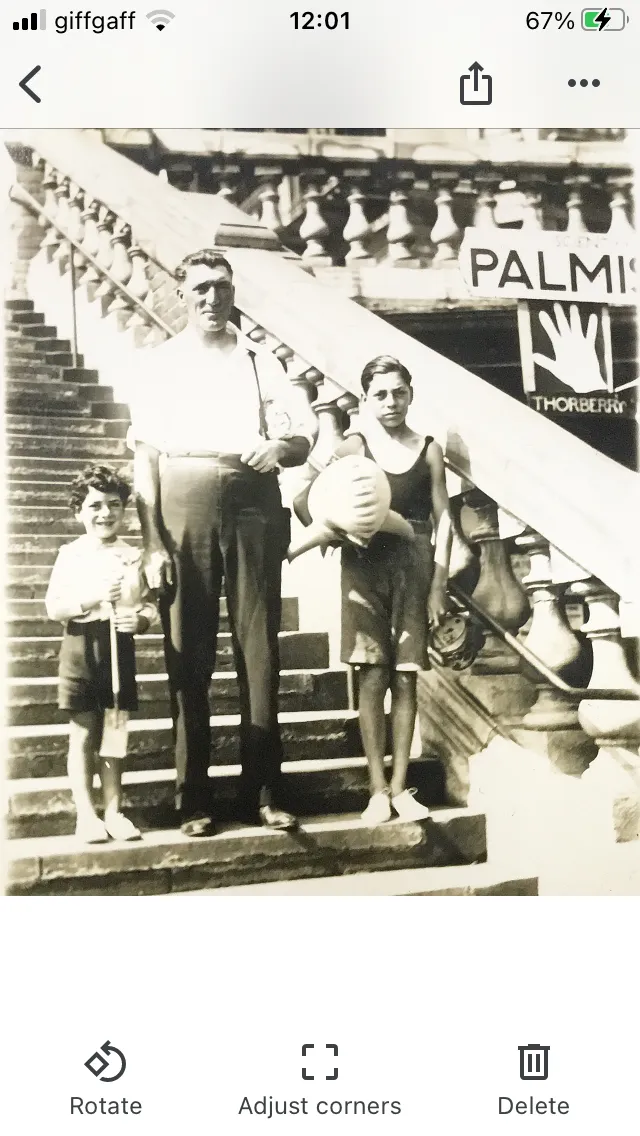
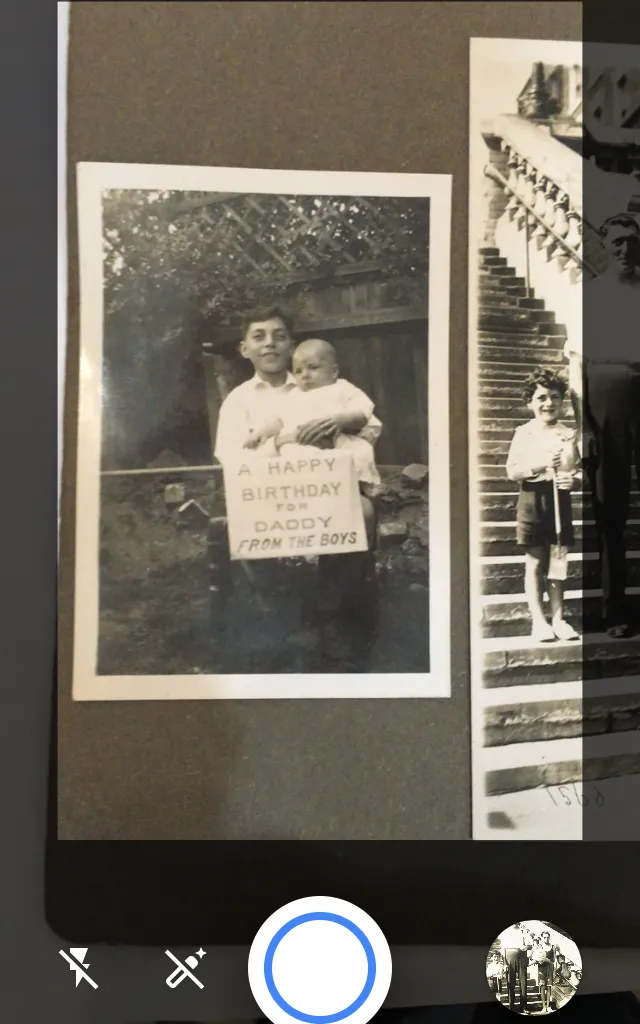
Once processed, you’ll see a small thumbnail of your scan appear next to the shutter button. Tap this to access your PhotoScan capture library. Tap the image and check that it meets your expectations. Sometimes glare remains, in which case simply discard your scan and try again. To do so, tap 'Delete' followed by the back button twice to return to the capture screen.
Step six - Adjust image using PhotoScan
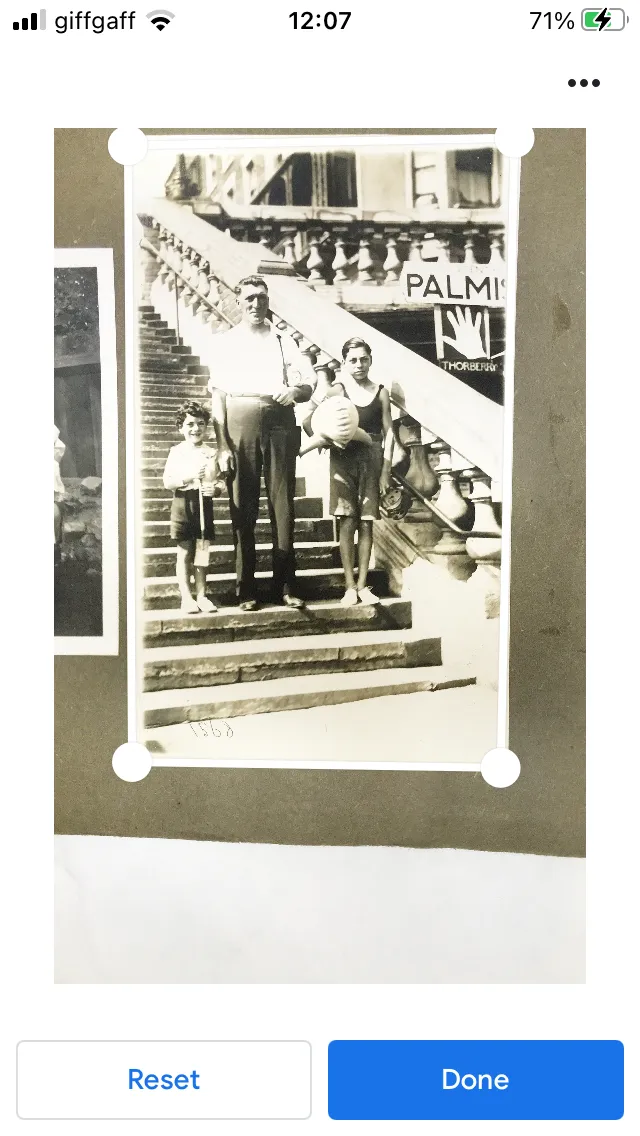
When reviewing a scan, you’ll see tools at the bottom of the screen to rotate it, plus manually adjust the frame if it’s not perfectly straight. When choosing the latter, you’ll be shown a wider shot of your photo, including its frame. Just tap and drag any of the edges or corners to adjust the frame followed by 'Done' to re-crop the image.
Step seven - Share or transfer your PhotoScan image
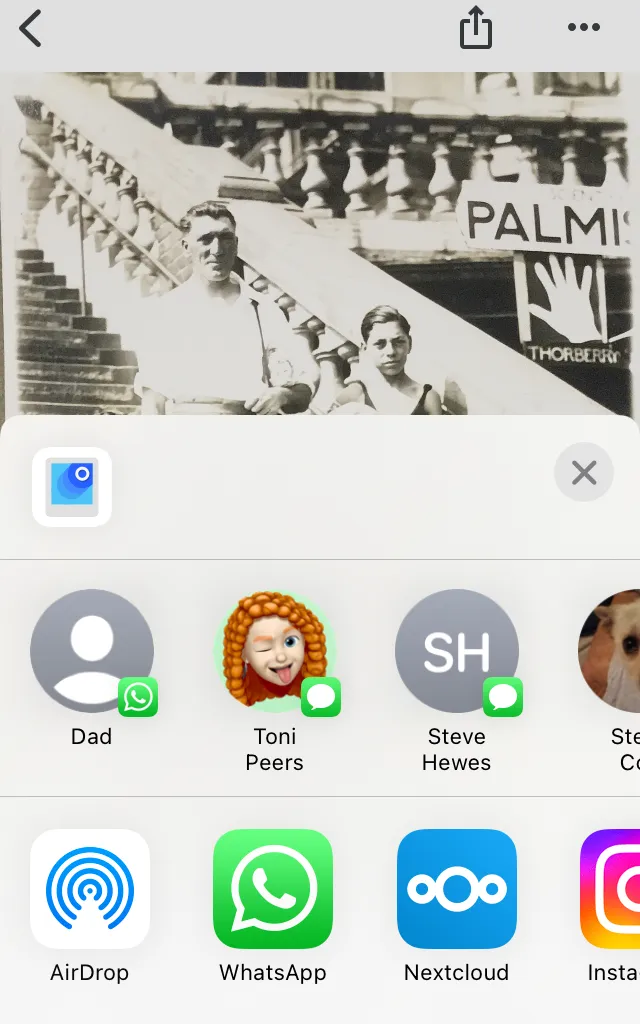
Once edited, you can opt to share your image with others or transfer it to your cloud storage or other app for access (and further editing) elsewhere. From the photo’s main screen, tap the share button at the top to select a person or app to share the photo with, open it for further editing or simply upload to your cloud storage following the prompts.
Step eight - Link the image to Google Photos
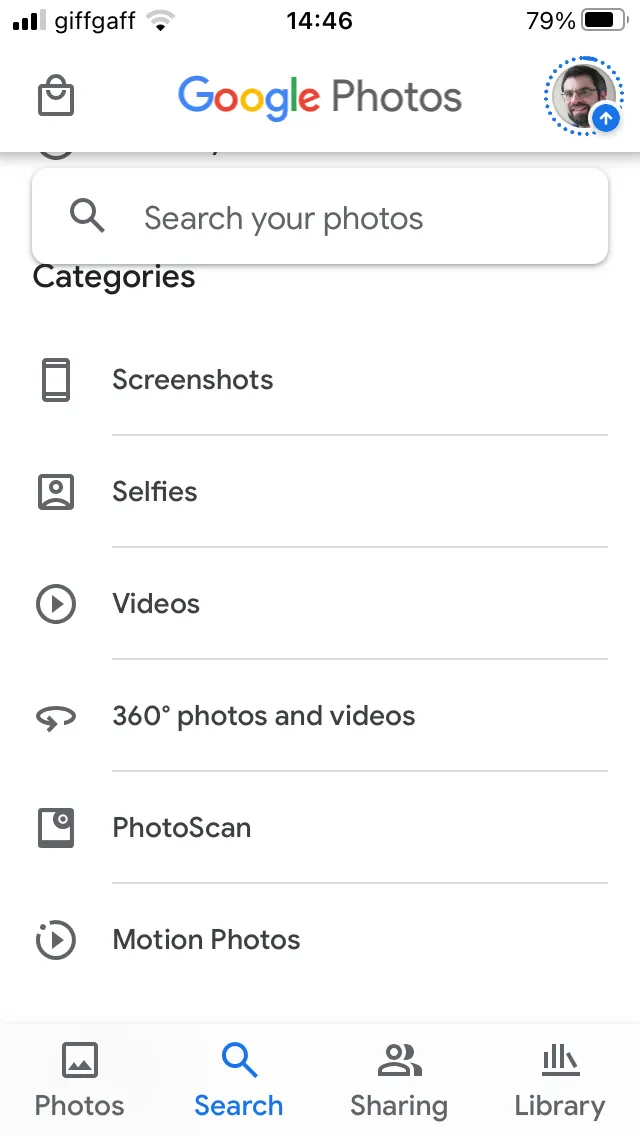
Install the Google Photos app on your phone, and PhotoScan will link to it automatically on Android, while Apple users will need to allow Google Photos to back up all your phone’s photos to Google Drive. Open the Photos app and you should be able to locate your scans easily; if not, try tapping 'Search', then selecting 'PhotoScan' under 'Categories'.
Step nine - Use the adjust and filter menus in PhotoScan
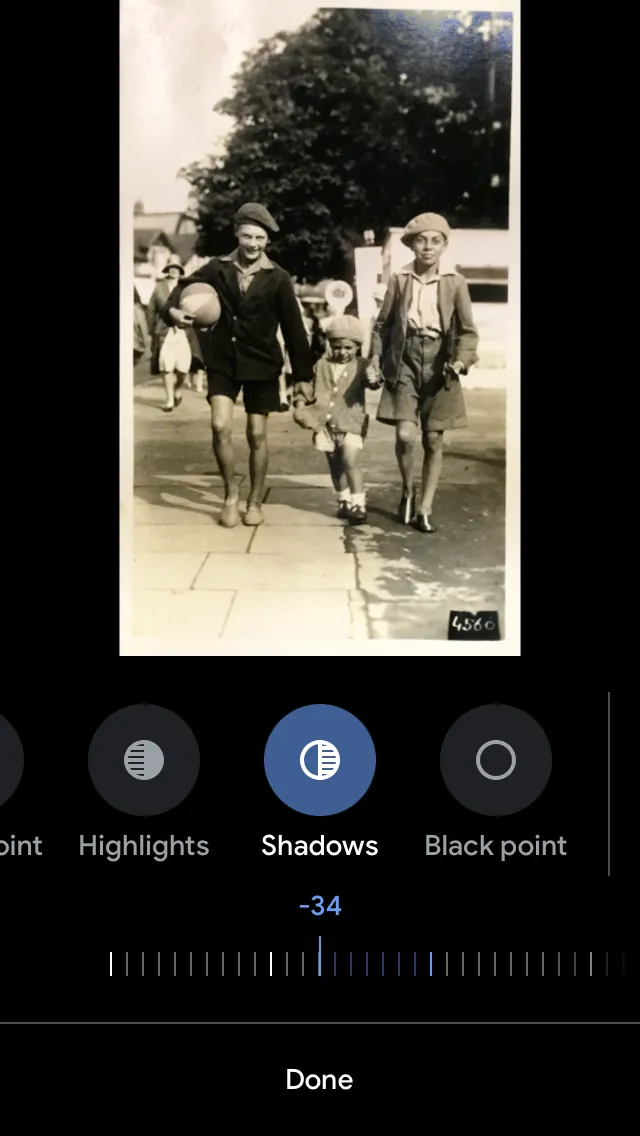
When selected, look for the edit button at the bottom of the screen (second from the left). Tap this to reveal some suggested improvements, or swipe right to access 'Adjust' and 'Filters' menus where you’ll find more useful tools for correcting lighting and colour balance. Tap an option, then use the slider underneath to tune it. Tap 'Done', repeat for other adjustments and finally tap 'Save'.